How Tos for EAM
- Make sure the custom-field and class (for the required entity) exist and note down the codes
- Go to Administration->Setup->Custom Fields->Associate Custom Fields
- Enter the name of the entity in the drop-down menu as well as the class code

|
Entity |
What |
|
PART |
Part |
|
EVNT |
Work-order |
|
OBJ |
Equipment |
|
CASE |
Logbook |
- Select the line where you want the custom-field to appear. We recommend keeping space in between numbers for easier addition (example below)

Here is a quick rule of thumb about which means to use for extracting what sort of information from EAM:
- Show filtered data from one table -> Use dataspies (dataspies can be personal, linked to a user group or global)
- Share filtered lists -> Share the EAM Light URL after having selected the dataspy or after having entered filtering conditions (as it contains the filtering conditions)
- Show data from two or three tables if records can be easily linked (by a join in the query) -> Use custom grids
- Show data with conditions that cannot be represented by simple joins -> Use a database view and make it available via a custom grid
- Aggregate data with complex conditions, aggregate data on a time axis, aggregate data that requires data transformation -> Use Pentaho reports
- Display data graphically or with a special report layout -> Use Pentaho reports
In all cases the interface provides an option to extract the data to a spreadsheet format.
The full documentation on how to use the webservices can be found on https://eamws.docs.cern.ch/
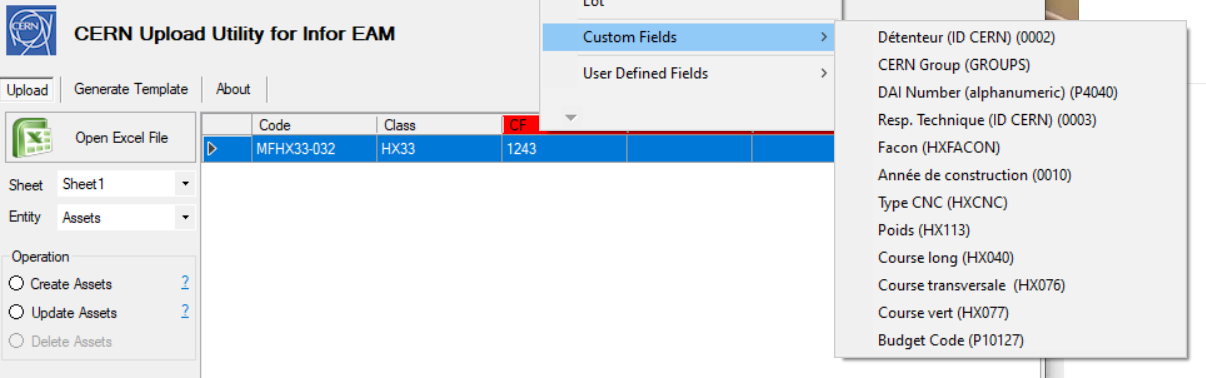
Single custom field values can be uploaded with Upload Utility. The only requirement is to have an entity that belong all to the same class.
You first need to select the environment (TEST or PROD) as the classes may be different (available on the Upload tab)
When you are ready to select the custom field header for the column, right click on the column name and scroll down to the "Custom fields" section. There you will find the custom fields available for the class of your entity
An alternative solution exists that allow you to bulk update many custom fields from the same class.
1. Select "Upload" and open any Excel file (it can even be empty) and select the environment (TEST or PROD)
2. Select 'Generate Template' and choose the entity for which you wish to update CFs
The template should contain at least the code (part, asset, position, system) or the number (work-order), the class-name and the class custom fields you wish to update
3. Save the template as Excel, update the file with the entity codes, custom fields and save and close it
4. Back in the Upload Utility chose 'Upload' open the file, select the entity, the environment (TEST/PROD) then go to the Upload tab, open the file and select the correct Entity, select "Update" and click
You can access EAM through the following links:
EAM (Production) - https://eam.cern.ch
EAM Light (PROD) - https://eamlight.cern.ch
EAM (TEST) - https://testeam.cern.ch
EAM Light (TEST) - https://testeamlight.cern.ch
Note that if you do not have an account created, you might encounter an error at the first time you login informing you that you do not have an account. If this happens, please login on EAM Light for the automatic account creation process to happen.
Should you have the wrong access rights, please contact your Local Administrator or eam.support@cern.ch
You can go directly to certain pages in Infor EAM that link to a specific Asset, Position, System, Location, Work Order or Part, by going to a specific URL that they can format according to you want to access.
How to create an EAM direct link?
To create a direct link, we have to use the following format.
Asset: https://www.cern.ch/cmms/asset.php?code=asset code
Position: https://www.cern.ch/cmms/position.php?code=position code
System: https://www.cern.ch/cmms/system.php?code=system code
Location: https://www.cern.ch/cmms/location.php?code=location code
Work Order: https://www.cern.ch/cmms/workorder.php?code=workorder code
Part: https://www.cern.ch/cmms/part.php?code=part code
Note 1: This link is only for the EXTENDED version of EAM.
Note 2: Replace https://www.cern.ch/cmms by https://www.cern.ch/cmms-test for direct links for the test environment.
There are many documentation files for EAM Extended that are updated from time to time whenever a major version release happens. You can find these documents in the links below.
Official Manual: https://edms.cern.ch/document/1266400/11.7
Tips and Tricks: https://edms.cern.ch/ui/#!master/navigator/project?P:1089122115:1089122115:subDocs
To know more about inspections please consult the following links:
Inspection Module - Infor EAM 8.3 Extended
Inspection Work Orders - Example
Inspection Management with Infor EAM 8.3 & CERN EAM Mobile Application
Lots are used to keep track of specific batches of equipment or parts that you order.
Let's say you ordered 10 pallets of hinges, from different manufacturers. You can create a Lot in EAM that denotes such lot code from the manufacturer and then add it to your transaction (Return or Issue).
Requirements:
- Part should NOT be Tracked by Lot in EAM if the part if tracked by quantity
- Lots must be created in advance in Materials > Setup > Lots - (EAM)
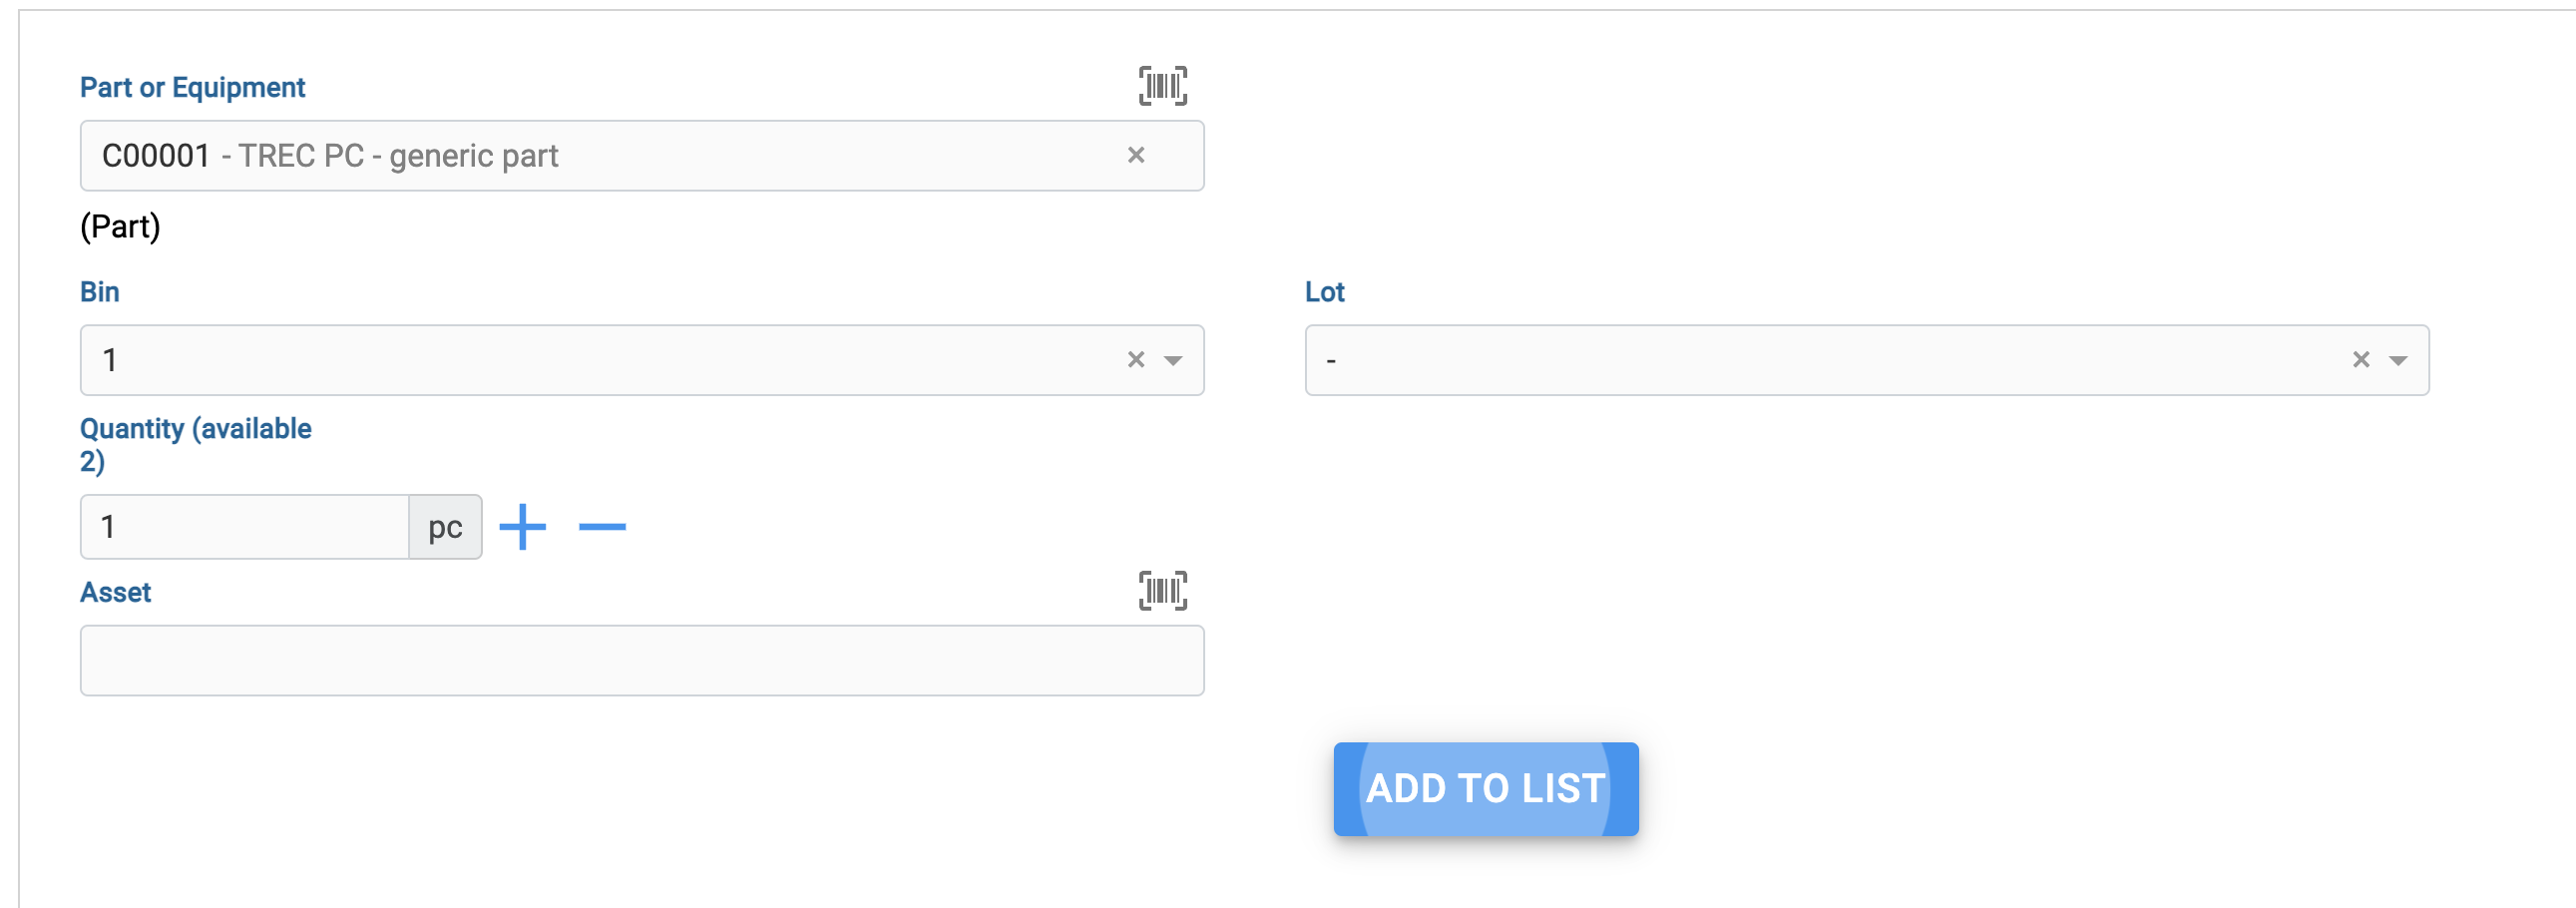
After you receive the tools and put them in your Store, when doing a return transaction, make sure to
1) First select the part
2) Then select the Bin
3) Then select the Lot to which the parts belong. This allows you to put parts of many different lots into the same bin.
If your part is tracked by asset and you wish to handle the lots you should also select the tracked by 'lot'
If your assets also exist and are using a part, you must remote the part reference (only works for assets not in store) and reselect the same part.
This allows entering the correct lot number for the asset
You might have an issue whenever you access the test versions of Infor EAM, EAM Store Kiosk, EAM Light, Equipment Generator or EAM Barcoding, in which you encounter a page mentioning that the connection is not secure. It may closely resemble the following:
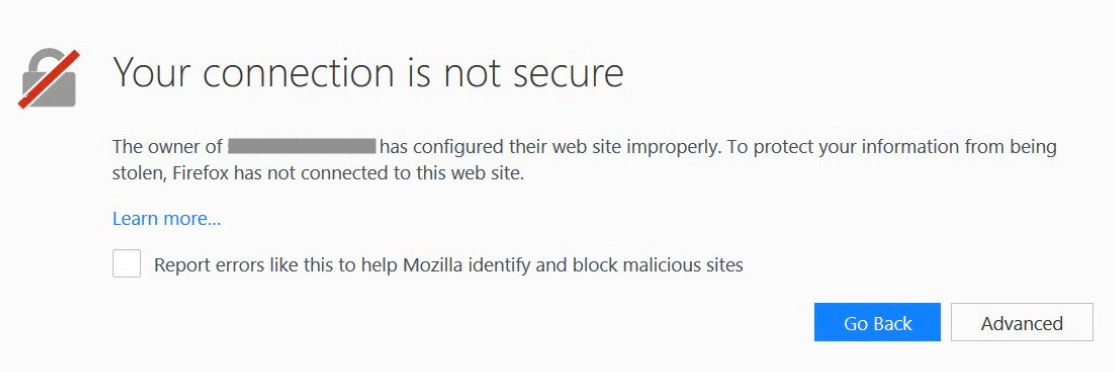
If this happens, it means that your computer does not have the right certificates from CERN installed.
You can install them with the following steps:
1. Go to https://cafiles.cern.ch/cafiles/
2. Click on Install Certificates
3. Install both CERN Root Certification Authority Certificate and CERN Grid Certification Authority Certificate
All certificates should be able to be installed only by downloading and clicking on the file. For a tutorial on how to install certificates in depth, in case you have an issue, there is support available for Mac, Linux and Windows users. After this, you should be able to enter the test instances without the warning popping up. If you keep having trouble, please feel free to email to eam.support@cern.ch